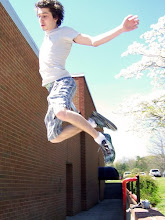
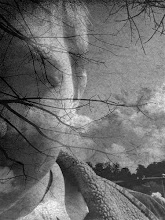
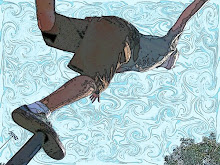
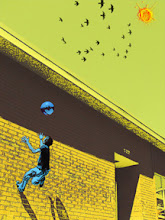
Outdoor Photographer magazine's Winter Photo Contest is for anyone 18 and older and is free (unless I missed something in small print...) The deadline is February 20th.
Their Magical Adventures contest deadline is January 4th.
Saturday, December 29, 2007
Eliot Porter and Robert Ketchum
If you haven't opened up your January 2008 issue of Art Education yet, you'll be happy to see that the instructional resource center pullout is: Eliot Porter and Robert Glenn Ketchum: A Conversation on Color, Composition, and Environmental Conservation. Although recommended for grades 5-7, it is certainly a great idea for higher grades.
In addition, there is a nice interactive site designed for student learning from the Amon Carter Museum (in Fort Worth, Texas) : http://www.cartermuseum.org/edu_guides/porter/
A discussion of the two photographers on outdoorphotography.com http://www.outdoorphotographer.com/content/2006/dec/form_function.shtml
Robert Glenn Ketchum's website: http://www.robertglennketchum.com
And the book: Regarding the Land: Robert Glenn Ketchum and the Legacy of Eliot Porter
Labels:
Eliot Porter,
lesson idea,
photography,
Robert Glenn Ketchum
Tuesday, December 18, 2007
Layers Project

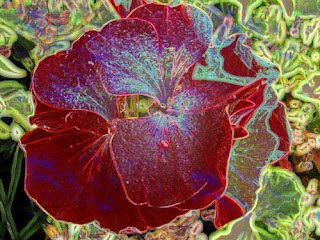
This is always a favorite project with my students because there are always surprises and many creative possibilities.
In Photoshop, the student copies the layer and then applies a different filter to each layer. Then he uses the blending modes to find the best blend. He adds a new empty layer for some Photoshop brushes (I suggest a new layer for each brush). I require that the students do the project twice (with two different images, of course) so that they really explore the possibilities. Also, when learning Photoshop, I've found that doing a project twice makes the process stick in your long-term memory better and, of course, pushes the level of quality up, since during the second attempt they are more fluent and fluid.
If you are on my email list, I will be sending you the handout for this.
Don't know where these came from
Tuesday, December 4, 2007
Short and Sweet Photography Tips
This idigitalphoto blog page has a wonderful list of tips to share with your students. It's called "Improve Your Photos 60 Seconds at a Time" (referring to how long it takes to read each category).
Tuesday, November 27, 2007
Layers Magazine

Layers Magazine is a nicely designed magazine for Adobe Creative Suite products (Photoshop, Illustrator, Indesign, Flash, Dreamweaver as well as digital photography.) What I like about it is that the purpose of the magazine content is education, not enticing you to buy more stuff. They also provide many tutorials online.
Monday, November 26, 2007
Illustrator Portrait Project

This lesson teaches drawing skills with Adobe Illustrator as well as the value tone scale and how to see in black and white. It also teaches patience and the importance of focusing and slowing down to improve craftsmanship. Ideally, a tablet is best, but I only own 2, so this guy drew his with his mouse. (Using LiveTrace is cheating! When you are done, you can have them try LiveTrace on the photo to see the difference between letting the computer make all the decisions and the artist doing it.) If you went to art school before computers, you probably remember doing a project like this with first drawing the portrait then using Color Aid paper, tracing paper, xacto knife, and rubber cement for the final.
1. Import a color photo.
2. Lock that layer and make a new layer.
3. On the new layer, make 1 small black square with no outline and copy it 7 times. Now, using the color palette changed to Grayscale, fill each square with gradually lighter grays until the last square is almost white.
4. Tracing the photo, draw a black shape where you see the darkest value tone. Use the eyedropper to choose the black square. Continue with the progressively lighter shapes.
5. Turn off the eye on the photo layer to see all the white spaces left.
6. Use the anchors to stretch the shapes to touch.
7. Add a border or fill the background with a gray. Delete the value tone scale you made in step 3, or if you want to see it for grading purposes, move it to outside of the print area.
Option: Make a copy of the finished file. Now select the highlight areas and change them to warm colors and the shadow areas to cool colors. Now you have a sort of expressionist portrait and you don't have to redraw the shapes.
Another Option: Now go into a studio room, transfer the image to poster board using the grid method and paint with acrylics. Now, they've learned to mix paint as well.
If you want a copy of my actual handout for the students, or have questions, just email me.
Labels:
Adobe Illustrator,
greyscale,
lesson idea,
portraits,
value tones
Yet Another Reality Show?!
This one is about photographers. One of my students watched it and told me about it. I think I'll offer extra credit for whomever watches it because in between the emotional ups and downs, there might be some useful information about shooting people, which is something we will do in the spring. (Maybe I should come up with a different phrase for 'shooting people'. "Don't forget to shoot your friends this weekend," or "Next week we're going to start shooting people, " might get me in trouble.)
It's called The Shot and is on VH1 on Sundays at 10 EST.
It's called The Shot and is on VH1 on Sundays at 10 EST.
Scholastic Art Competition
This is just a reminder that the Scholastic Art competition is a lot earlier this year (or at least for the region I am in-SW Virginia). If you planned on entering student work, but haven't received any information yet, you should look into it.
Here is the link the general info. You will have to contact your regional sponsor to get the specifics for your regional competition.
If you can't remember why the this competition is worth the effort, check out this list of scholarships available (and there are even more than are listed). We've been very lucky to have two students win at the national level and they received a ton of scholarship money. And one even had his work on display at the Corcoran for a summer, along with the special workshops in NYC they provided.
Saturday, November 24, 2007
Graphic Design Lesson Ideas

I've discovered a wonderful website by an art teacher in California who used to teach high school Graphic Design and Web Design but now teaches at the college level. Her old website is very well organized and I asked her permission to tell you that we can "steal" her lessons. You can link to her lessons from her calendar under either class, or from the menu to the right. http://www.nhsdesigns.com/ She also has a blog called "Dawn's Brain: The adventures of a high school web and graphic design teacher." And she's started a forum for Art Teachers http://www.artteacherforum.com/ Her new college website is urlnextdoor.com Thank you, Dawn.
By the way, on her blog, the lesson "Cut Paper Illustrations" is based on a book that I love, Picture This by Molly Bang. It explains composition very well and my students have always been mesmerized by the slide show I've made from it, even though her illlustrations are very simple. You could very easily do this lesson using Adobe Illustrator if you don't have room for studio projects like me. You can order the book from Amazon using my bookstore link.
If you have children, or love children's books, you probably already know who Molly Bang is. My favorite is The Paper Crane. I still enjoy looking at it even though my boys are in high school and college.
Labels:
college,
forum,
graphic design,
high school,
illustration,
lessons,
Molly Bang
Friday, November 23, 2007
Future Innovator?

We finished the classic graphics lesson, students dreaming up a business for themselves, making the logo, creating the ad. I thought you would get a kick out of this young lady's business idea. Perhaps I didn't remind them enough that they can't promote violence, but, other than a few very minor problems, she did a good job with the design and problem-solving. I required Visual Hierarchy: make it clear what you want the viewer to see first, second and third.
Nothing digital here
Ok, so this art is not digital, but you've got to see this.
http://www.dailymail.co.uk/pages/live/articles/news/worldnews.html?in_article_id=495538&in_page_id=1811
http://www.dailymail.co.uk/pages/live/articles/news/worldnews.html?in_article_id=495538&in_page_id=1811
Chris Jordan's Photography Art
You may have seen Chris on television recently explaining his "activist" images. Upon closer look at his art and replicas of famous art, you see that they are made of small images that represent the protagonists in our culture. For example, his version of Seurat's ...La Grande Jatte is made up of 106,000 photos of aluminum cans, which equals 30 minutes of U.S. can consumption.
http://www.chrisjordan.com/ (Choose the Running with Numbers gallery to see the Seurat image)
I see his work as an exemplar for a project using art for activism.
http://www.chrisjordan.com/ (Choose the Running with Numbers gallery to see the Seurat image)
I see his work as an exemplar for a project using art for activism.
Thursday, November 22, 2007
Website to Visit
Have you discovered John Paul Caponigro's photography site? http://johnpaulcaponigro.com/
In addition to his gallery of surreal composite photos (good examples for a surrealism project), he has some informative interviews with professional photographers and artists in his "Artists on Art" section. I plan on having my students read and comment on one of those interviews every month or so.
He is a workshop photography educator and he has included some helpful writings and mini lessons available in his Download section. If you subscribe to Insights you get access to more than if you don't.
Wednesday, November 21, 2007
What would you like to discuss?
The whole purpose of this post is to ask you to leave comments about what you would like more information about.
If you want to contribute to the blog, email me and I'll add you to the author list. (Examples: great lessons you did, visiting artist, field trips, your own work and thoughts, etc.)
If you want to contribute to the blog, email me and I'll add you to the author list. (Examples: great lessons you did, visiting artist, field trips, your own work and thoughts, etc.)
More Forgotten Information
Boy, I seem to be thinking of a lot to say, this first day of the blog...
One thing I did not include in your CD were handouts for a couple studio projects that we did to get the students away from the computers, and to introduce them to other art forms in case this is the first art class they've taken in a long time. This only works if you have a lot of available space away from the computers, like an empty room.
These are the two we did last year: Handmade photo album, using mixed media and the japanese method of binding. Arylic painting based on one of their photos using the grid method to enlarge onto their paper. I can see using a black and white photo to learn to value tone drawing.
Other teachers wove photos together, for example. Here's a David Hockney inspried montage lesson: http://www.princetonol.com/groups/iad/lessons/high/cubismphoto.htm Please share any ideas you have.
Labels:
bookbinding,
high school art,
mixed media,
painting,
photography
Photography Contest
If you didn't already receive this brochure in the mail, Drexel University is sponsoring a photography contest for high school students. The Deadline is 12/08/07. The fee is $20 per person for up to 3 entries. I emailed them and they do accept digital photography (the brochure didn't specify darkroom vs. digital). Each photo must be matted with the form on the back.
http://www.drexel.edu/westphal/academics/undergraduate/photo Click on the green contest logo to see the pdf of the brochure with all the info and the entry forms.
http://www.drexel.edu/westphal/academics/undergraduate/photo Click on the green contest logo to see the pdf of the brochure with all the info and the entry forms.
2007 VAEA Conference DP Workshop Loose Ends
It felt like my allotted time was 10 minutes, not 50. I couldn't cover everything, and it seemed like I didn't go in depth into anything. I guess that is what this blog is for.
One thing that is on your CD that I didn't explain is the folder with flickr screen shots. Since I teach 3 sections of Digital Photography, AND I don't want to constantly be printing out photos all the time, I borrowed an idea from a local college professor. My students upload some of their photos onto our private flickr site. Then they can critique, or just leave (intelligent, mature) comments for each other, even students in other classes. I have also formed a flickr group so that teachers in other schools can join us as well. So, now they can leave comments for students in other schools. If you want to use flickr and would like to join our group, let me know.
Another thing I'm not sure I explained was that although I have taught units of Digital Photography for several years, last year was the first full-year class. The handouts and lessons are therefor still in the experimental stage. There might be some mistakes in some of the handouts I haven't used twice yet. I apologize ahead of time. I will try to post anything I notice.
In addition, of course, you may have a different philosophy about teaching that would cause you to only use some, or add your own to the mix. I am big into covering the basics because many of my students have not had art since elementary school. So, discussing basic art elements and principles is essential. But, I sneak in more conceptual thinking as frequently as I can. If you are working with higher level art students, you might not need to cover so many basics.
For example, my students just did the hoax photography unit. I made this project's Big Idea, Adulthood, specifically, their future as it relates to the condition of the environment, negative or positive. In addition we made a poster that included our hoax photograph and I showed them how to add text and special text effects in Photoshop. We had to discuss Visual Hierarchy in order to complete the design.
Street Photography is a great project for discussing Irony and many other topics that cover how humans relate to each other and their environment.
If any of you didn't have a chance to write this down, this is the website I recommended for teaching yourself Photoshop (or Illustrator, or Flash, etc., etc.) : http://www.lynda.com. Although it costs $25/month, you are not obligated to join for more than one month. It is by far much more economical than taking a class at a local college. You can play, rewind and replay the instructional videos as frequently as you want. I have had several friends tell me that it has helped them tremendously. If you are starting from knowing nothing about Photoshop, and there are several of you at your school system that want to learn together, I can also come to you and get you started. Once you feel comfortable with the software basics, you would find lynda.com a great way to increase your knowledge.
First Post
I thought that a blog would be an easy way for us to share information with each other, because the posts don't disappear and we can read it sort of like a book.... remember those rectangles that store paper and text?.. going back and forth searching for that choice piece of information we thought we read somewhere.
The reason I called it Digital Art Education is in case we want to also share ideas about Graphic Design, Web Design, Video Editing, Animation–any skills that we teach that necessitate using the computer to create the art–not just Digital Photography.
The blog format is a little plain right now. I chose a simple template until I find time to redesign it. In the meantime the simple one will not interfere with any photos we want to share.
I hope this format allows us to easily share our ideas about this exciting branch of art education. Invite your friends who did not attend the digital photography workshop at the VAEA 2007 to contribute as well.
Subscribe to:
Posts (Atom)


